
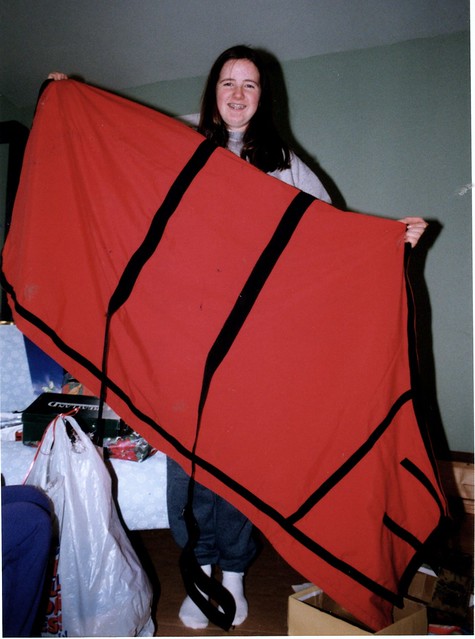
I'm terrible with Christmas presents. Just am not good at coming up with something to give a person. Some years back when the kids turned into adults, we put a $50 limit on Christmas gifts. Over the years, I've made some presents. Coming to mind at the moment is a horse blanket I made for Meredith one year when she had a horse in 4H. Another year we made a hockey net for David out of PVC pipe and some heavy fishing net we had bought at a garage sale. Usually the homemade gifts involve me rushing to finish them off, late on Christmas Eve. Not sure how it went with the horse blanket, but I do remember Larry and I, late at night both working hard at lacing that netting around the frame for the hockey net.
This year I had an idea for something homemade. As you may know, I've dabbled a little bit into the furniture painting world. I read all the blogs....some things I like, some I don't. I am a lover of real wood, but I've been fascinated at how you can give something a whole new look with paint. Over the year I've accumulated a pile of stuff that I want to play around with. And I do mean a pile. It was covered in a tarp, which keeps blowing off, and since it is quite close, in the barn/shop, to where Larry feeds Pride, there is no way Larry has been able to miss it. Sometimes I can 'hide' things in plain sight, and it probably would have been okay if the tarp had stayed in place. Larry would have just assumed it was some of David's automotive collection underneath it. I think.
So back to my idea. Meredith will be moving to her own place in the coming year. (There, it's down in writing, therefore it WILL happen). She is interested in all things British. She spent a few days in London at the end of a Contiki Europe tour in 2011. She spent a rushed week there last year as part of the great landrover hunt. She has a trip around the British Isles planned for 2015. She, along with me, has admired some of the furniture makeovers that included Union Jacks painted on them.

My original plan was to find a trunk or chest that could function as a coffee table and storage, and 're-do it' for Meredith. I would paint a Union Jack on the top. I did find one on Craigslist, but they were asking $100. I felt that was a reasonable price for what it was, but it was double my price limit. I waited to see if they would lower the price a bit, and then I would offer $50 with fingers crossed. That wasn't meant to be. I hummed and hawed way too long and it sold. Then I came across a cedar lined chest for free. It had some damage from puppy teeth, but I jumped on that ad right away. I was the lucky one, I thought. So we head to Langley one dark rainy night, about 20 minutes away. The chest was much smaller than I had thought. I had seen a picture, but hadn't thought to ask for measurements, and I guess I had just imagined it the size I wanted it to be. But, we were there, it was free, so I took it anyway. After much looking it over and realizing it is just a very cheap copy, put together from a kit, with major damage to the particle board trim, I'm going to send it off to the thift store. Someone will be happy to have it to store something in. Back to more hours perusing Craigslist.
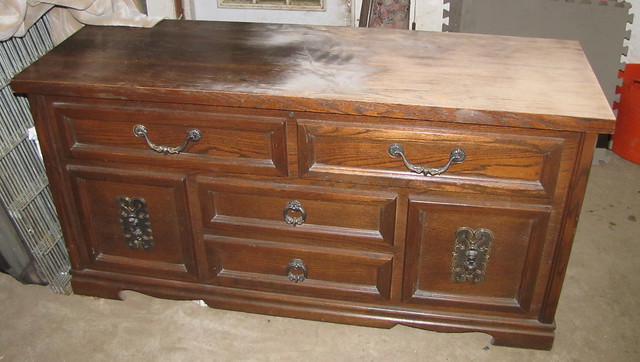
There were quite a few trunks or chests that were for sale. Most were too much money. Some were in my price range, but were too far to go, or I just couldn't make it work out. Then one popped up for $25. I was lucky and saw the ad almost right after it was posted, so contacted the seller right away, and we made arrangements to go and pick it up. About 35 minutes away this time. When we got there, the chest was much taller than I thought, not suitable for a coffee table, and really too high for a bench to sit on. But it did have some features on the front that got me interested in applying another technique. It was made by Huppe, a Canadian company out of Quebec, and was about 40 years old. It was built like a tank, was in great shape, and since we were there and it was only $25, I took it anyway:)
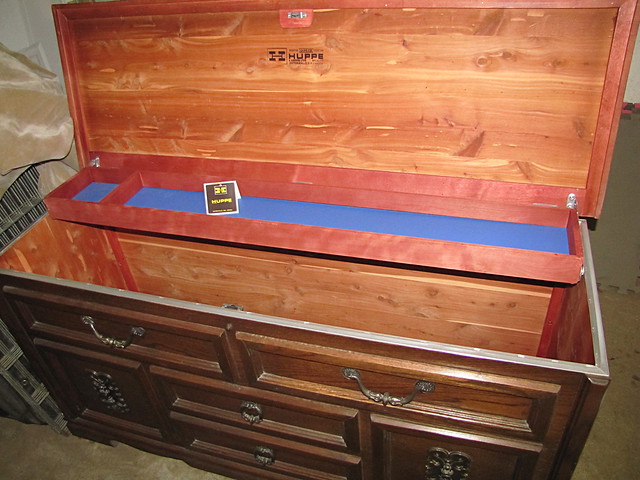
Looks like a dresser but it isn't. Just the lid opens. I had already started sanding the top here.
All nicely cedar lined though. That little shelf lifts out.
So there it sat, in the garage, for weeks. There was no room in there to work on it. Eventually we had to clean out the garage to fit the market trailer in. The market trailer is a small utility trailer that we take to the farmer's markets each week. In it we keep the tents, tables, racks, stands, the jam left over from the weekend, the sewing. Everything except anything new that I am taking the next weekend. It's a life saver, as it means when we get home after a market, we don't have to unload all that stuff from the truck, and then reload the next weekend. Since we continued to go to farmer's markets right through until the middle of December, and we had a below freezing spell of weather, I had to get the trailer inside so that I didn't have to worry about the jam freezing. After the last market, it took me a few days before the trailer was unloaded for the winter, and now empty, it was taken back outside to be stored until the next season. The chest had been under a blanket and had been a horizontal surface to hold Pride's bags of feed and the five buckets used to make his mashes each day. That was moved and now I had room to start sanding it. The top was sanded down to bare wood and the rest was sanded just to roughen up the finish.
I knew I had some walnut stain.....somewhere. Couldn't find it. Did find this really old tin of walnut stain, so old I didn't even think it was usable. I was so excited to find something the colour I actually wanted, that I forgot that I was going to paint first.
To be continued......
I knew I had some walnut stain.....somewhere. Couldn't find it. Did find this really old tin of walnut stain, so old I didn't even think it was usable. I was so excited to find something the colour I actually wanted, that I forgot that I was going to paint first.
To be continued......
Hurry...we need the rest of the story!
ReplyDeleteI have a stash of stuff to be redone too! I am anxious to hear the rest of the story:)
ReplyDeleteIt does look like a dresser. I love the cedar inside. I will be back!
ReplyDeleteWhat a treat to come across your project .. great job! I have this exact same cedar chest received around 1976 and have been staring it down for years wondering how to attack updating the look. Love how you've left the contrast between the lid and body and I'll likely be 'borrowing' the same idea. Thanks!!
ReplyDelete